To use your Shark Steam Mop, you’ll first assemble the handle and attach the mop head until it clicks. Fill the tank with distilled water to the maximum line, then power on and allow 20-40 seconds for heating. Press the steam control button to select your desired steam level—light, normal, or deep—then use consistent forward and backward motions while maintaining steady pad pressure. After each session, detach and machine wash your pads separately. Store your cooled mop upright in a dry location with the tank emptied. The specifics of each step warrant deeper exploration.
Assemble Your Shark Steam Mop Correctly
Before you’ll need to assemble your Shark Steam Mop by connecting its main components. Start by inserting the handle into the main body until you hear a click, ensuring arrow symbols face forward. Align the second handle into the lower pole connector for the spray pocket mop attachment. For extending cord length, utilize the quick-release cord holder and cord management clip to organize your setup efficiently.
Next, secure the mop head by sliding the Genius mop head into the steam mop body until it clicks. Attach your microfiber mopping pad to the frame using Velcro, aligning the indentation on rotating discs with plastic rings. Fill the water tank and install the lid to optimize water flow throughout your cleaning sessions. Tighten any screws with a Phillips head screwdriver for complete stability before operation. The main base machine includes adjustable settings that allow you to customize water temperature and steam output for different floor types. Before you begin cleaning, allow the mop to heat up properly to ensure optimal performance on your floors. To maintain your equipment’s longevity, remember to regularly change the microfiber pads after each use and ensure they are air-dried completely before reuse.
Fill Your Shark Steam Mop Tank and Power On
Once you’ve assembled your Shark Steam Mop, you’ll need to fill the water tank and power on the unit before you can begin cleaning. Guarantee the mop is unplugged and completely cooled. Remove the water tank cap by turning counterclockwise, then pull the tank from the unit. Using the provided filling flask, pour distilled water into the tank until you reach the maximum fill line. Confirm water level accuracy to prevent overflow. Reattach the cap by turning it clockwise until firmly secured. Slide the tank back into place until it clicks. Plug the mop into an electrical outlet. The indicator lights will blink as the unit enters standby mode. To ensure the mop functions properly, allow adequate time for water heating before beginning your cleaning session. Prime the mop by pumping the handle downward to release initial steam. Monitor tank refills during extended cleaning sessions for consistent performance. Always check all parts are secure before plugging in the mop to ensure safe operation.
Control Steam Output and Mopping Motion
To maximize your Shark Steam Mop’s cleaning effectiveness, you’ll need to master both steam output control and proper mopping technique. Press the steam control button to activate your desired steam level—choose LIGHT or NORMAL for everyday cleaning, or DEEP for stubborn stains. Allow 20-40 seconds for the unit to warm up and generate steam. The self-cleaning brushroll automatically eliminates the need to manually clean dirty pads between uses.
During mopping, use forward and backward pushing and pulling motions across your floor. Maintain consistent pad pressure and surface contact throughout each stroke to guarantee thorough cleaning. Tilt the mop head downward to engage the brushroll. For particularly dirty areas, flip your pad over to access the scrub side. Different Shark steam mop models offer varying steam output levels to match your specific cleaning needs. The spinning pad action intensifies in DEEP mode for enhanced cleaning power, though you’ll need to apply proper physical effort to achieve ideal results. Shark’s rotating heads perform over 150 scrubs per minute to enhance your cleaning efficiency. Avoid continuous contact in one spot to prevent potential damage to your sealed tile floors.
Wash and Reuse Your Pads After Each Session
How do you extend your Shark Steam Mop pads’ lifespan and maintain their cleaning performance? You’ll want to deep clean pads after each mopping session. Start by detaching pads and shaking off loose debris outside or over a trash can. Remove large debris by hand or soft-bristle brush, then pre-rinse with warm water.
For machine washing, use a gentle cycle with warm water between 40°C–60°C and mild liquid detergent. Wash pads separately to prevent damage, and avoid bleach, powdered detergent, or fabric softeners. After washing, rinse thoroughly until no soap residue remains. Squeeze out excess water and air dry flat or hung up—never use high heat. To preserve the pad’s texture and absorbency, ensure you follow proper drying methods that maintain steam distribution capabilities. Storing your pads in a dry, well-ventilated area prevents mold and odors that can develop from moisture retention. Regular cleaning prevents the buildup of residue that can reduce cleaning effectiveness and potentially damage floors. Properly wrapping or securing the power cord when not in use prevents tangling and wear to your equipment.
Following these steps helps extend pad lifespan to 3–4 months with normal use.
Store Your Shark Steam Mop for Long-Term Use
Before you put your Shark Steam Mop away, you’ll need to follow a proper cooling and preparation sequence to protect the unit and guarantee it’s ready for future use. Allow the mop to cool completely, then empty the water tank entirely and make certain it’s dry before storage. Remove all pads and attachments, storing them separately to prevent surface damage.
For proper storage placement, hang your mop by its handle on a large hook or position it upright against a wall in a cool, dry location away from high-traffic areas. Wrap the cord around built-in hooks and clip the filling flask to the handle pole. Ensure all steam has been released from the mop head before storing to prevent damage to internal components. When organizing your stored mop, keep track of all connection points and release buttons to facilitate quick reassembly when needed.
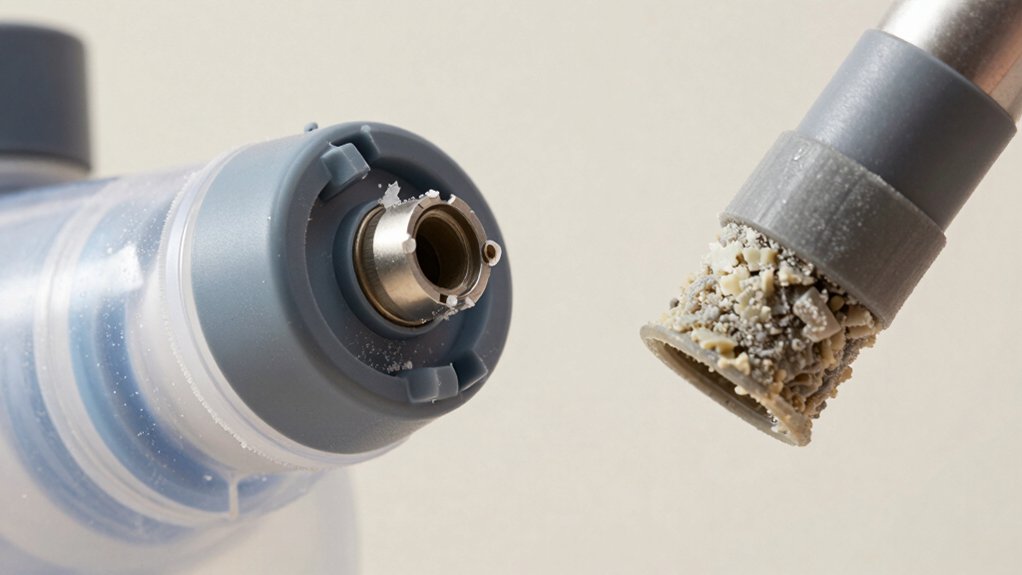
Establish a routine maintenance schedule using distilled water to prevent mineral buildup and decalcification. Regular descaling of the unit will help maintain optimal performance during extended storage periods. Allow all components to dry completely before storage to prevent mold and mildew growth. This preparation ensures your Shark Steam Mop remains in ideal condition for extended periods.